What is Facebook Pixel & How Does It Work?

Facebook(Meta) Pixel is a code you can add to your website to track and measure the effectiveness of your Facebook advertising. Thanks to this feature, you can measure conversions, make custom audiences for retargeting, and tailor your ads to the particular activities that visitors perform on your website.
The pixel will convey data about visitors and notify you whenever someone makes a purchase or joins your mailing list so that you can follow up with an advertising campaign.
You can track the success of your advertising and improve its performance by using the Facebook Pixel, which sends information back to Facebook whenever someone visits your website and completes a specific activity, like making a purchase or filling out a form.

Additionally, you may utilize the Facebook Pixel to build custom audiences for retargeting, which enables you to display advertisements to website visitors who have already been to your site.
Overall, the Facebook Pixel is a potent tool that may be a useful addition to any company’s marketing plan because it can help you better understand and interact with your audience.
How to Add Facebook Pixel to Shopify?
Adding Facebook (Meta) pixel to Shopify stores is practical if you follow these steps. If you don’t know how to create a Facebook pixel, we explained it in this section as well. Let’s see how to add Meta pixel to Shopify with simple steps.
If you already have a pixel, you can jump into the “Adding Facebook Pixel Code via Shopify Integration” part.
Note: You need to have a Facebook ad account to complete this integration process.
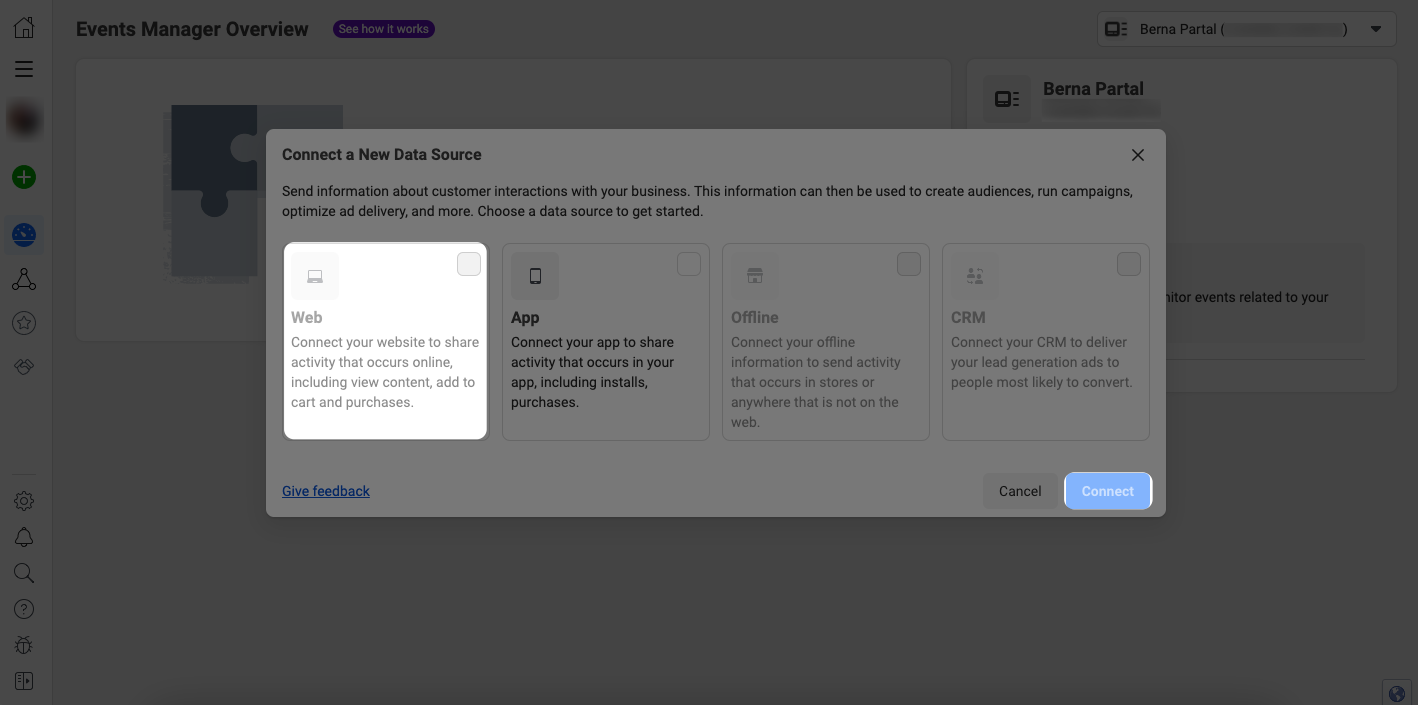
To create your Facebook or Meta pixel, go to your Facebook ad account’s “Event Manager.” From the “Connect a New Data Source” part, select “Web.”
Then, from the “Create Pixel” section, enter a name for your Facebook pixel under the “Name Your Pixel” part. Click on the “Create Pixel” button when you are finished.
You will proceed to the “Check for partner integration” part, where you can add your website.
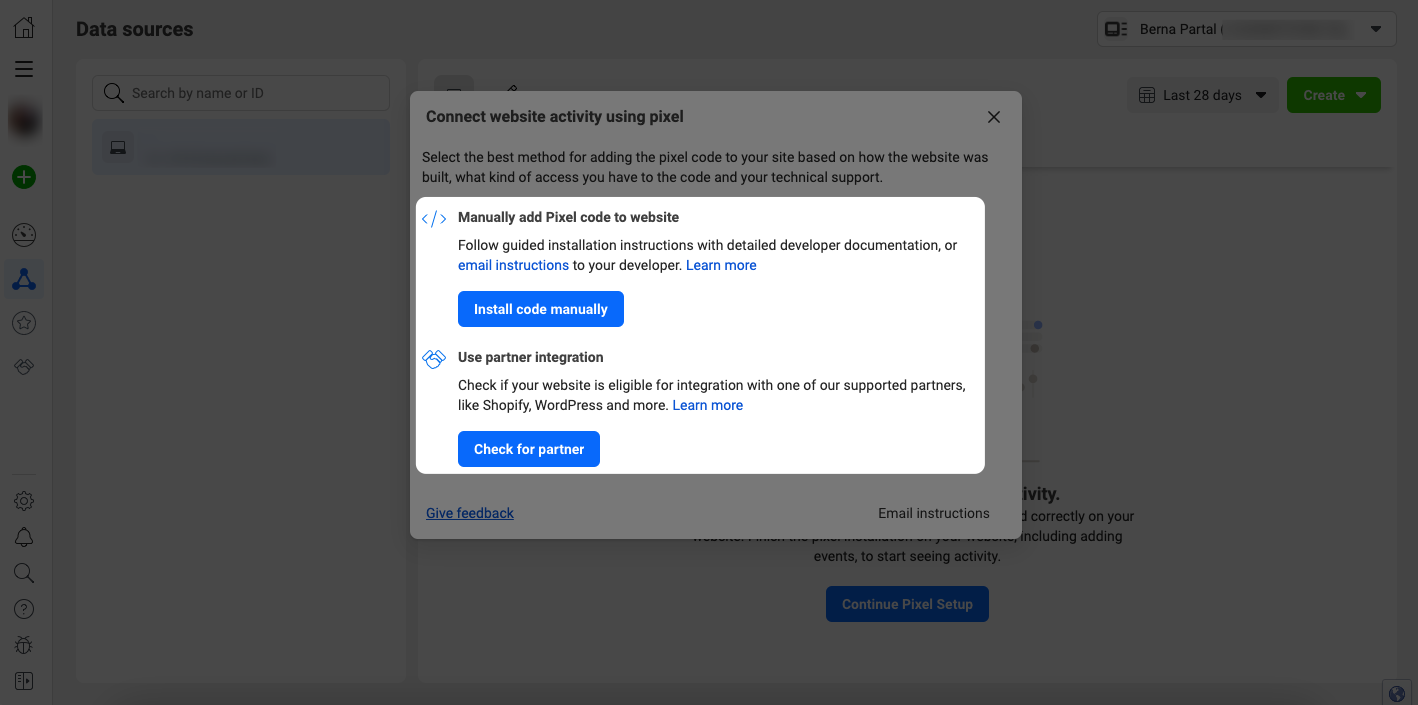
You can add a pixel to your website from the “Manually add Pixel code to website” or “Use partner integration” parts.
Adding Facebook Pixel Code via Shopify Integration
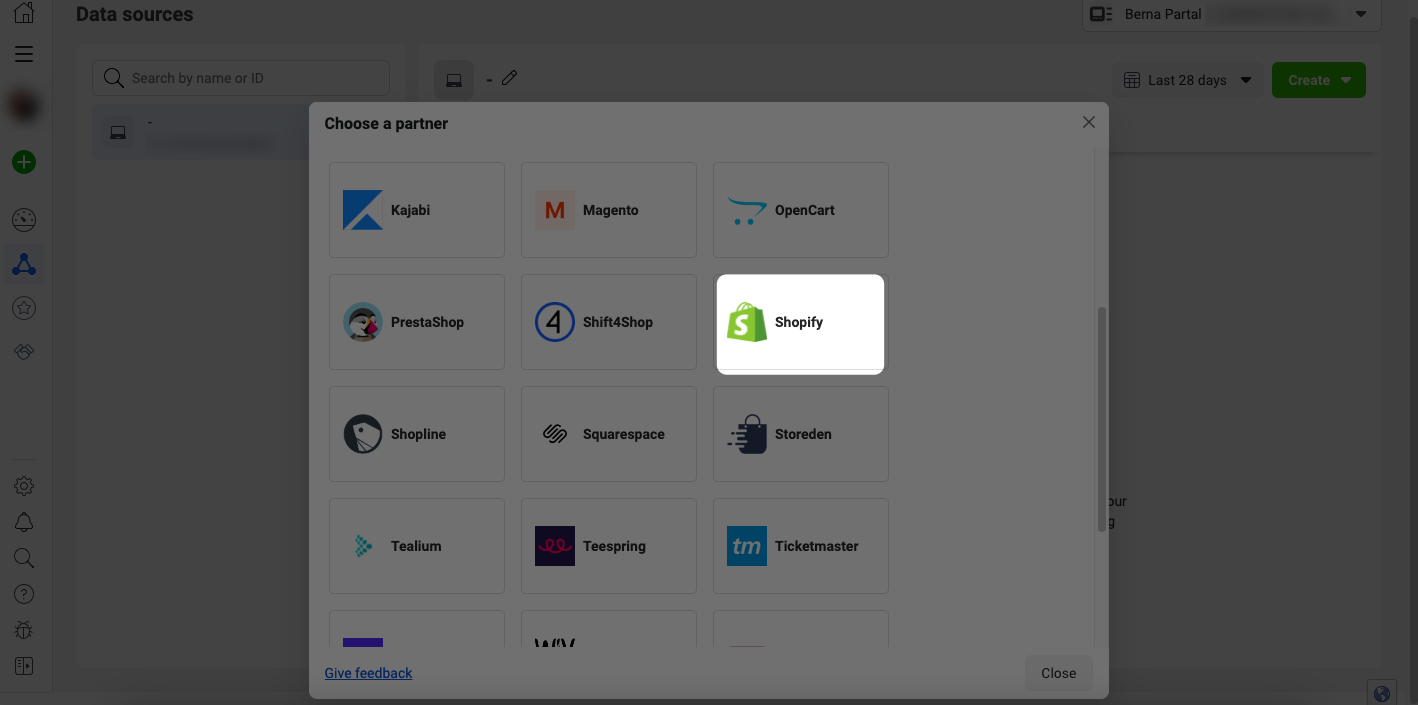
If you choose “Use partner integration,” you can select “Shopify” from the “Choose a partner” menu. That way, you can connect your pixel with your Shopify store.
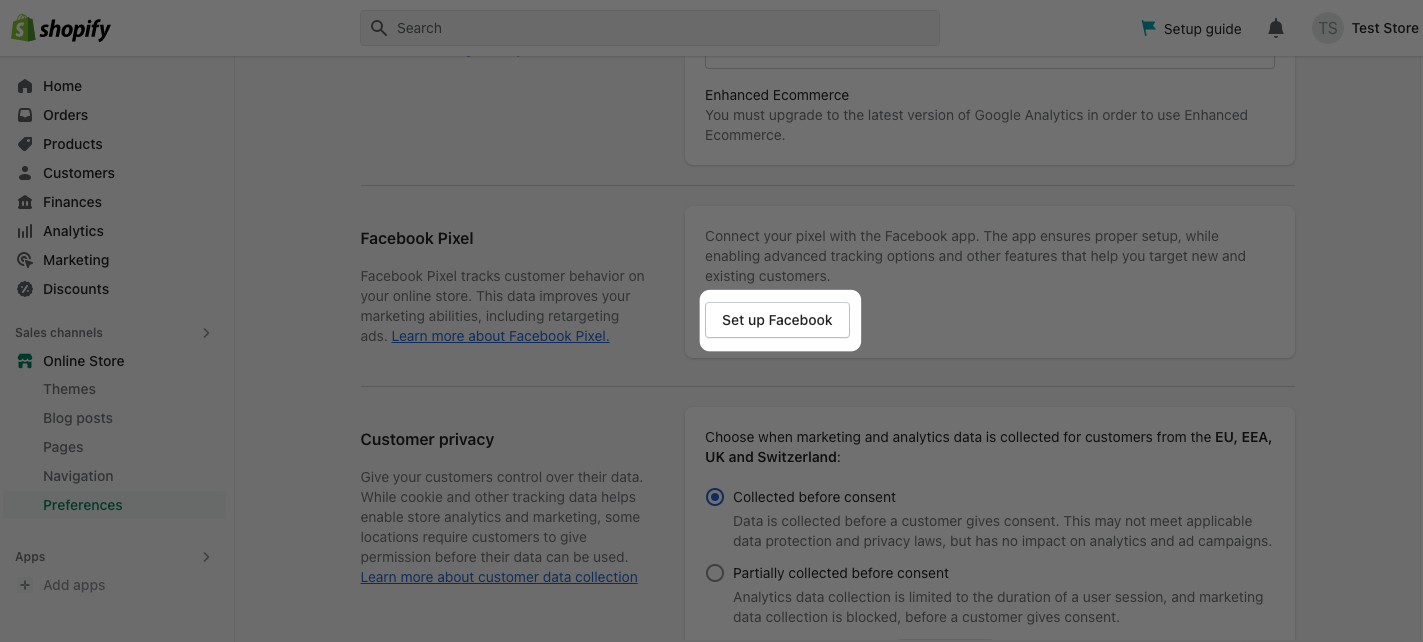
Then, go to your Shopify admin panel, click “Sales Channels” first, and select “Preferences” under the “Online Store” part. Scroll down to the “Facebook Pixel” section.
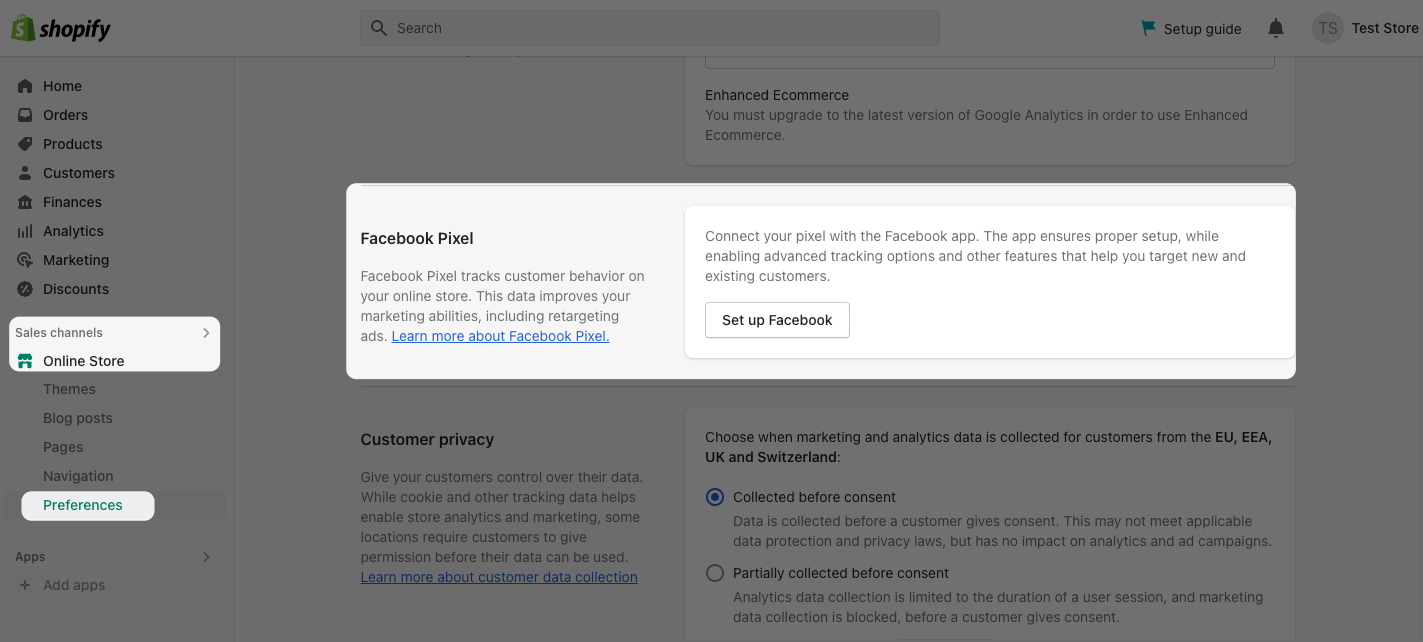
Then, click on the “Set up Facebook” button to integrate it with your store. It will take you to the Facebook & Instagram app.
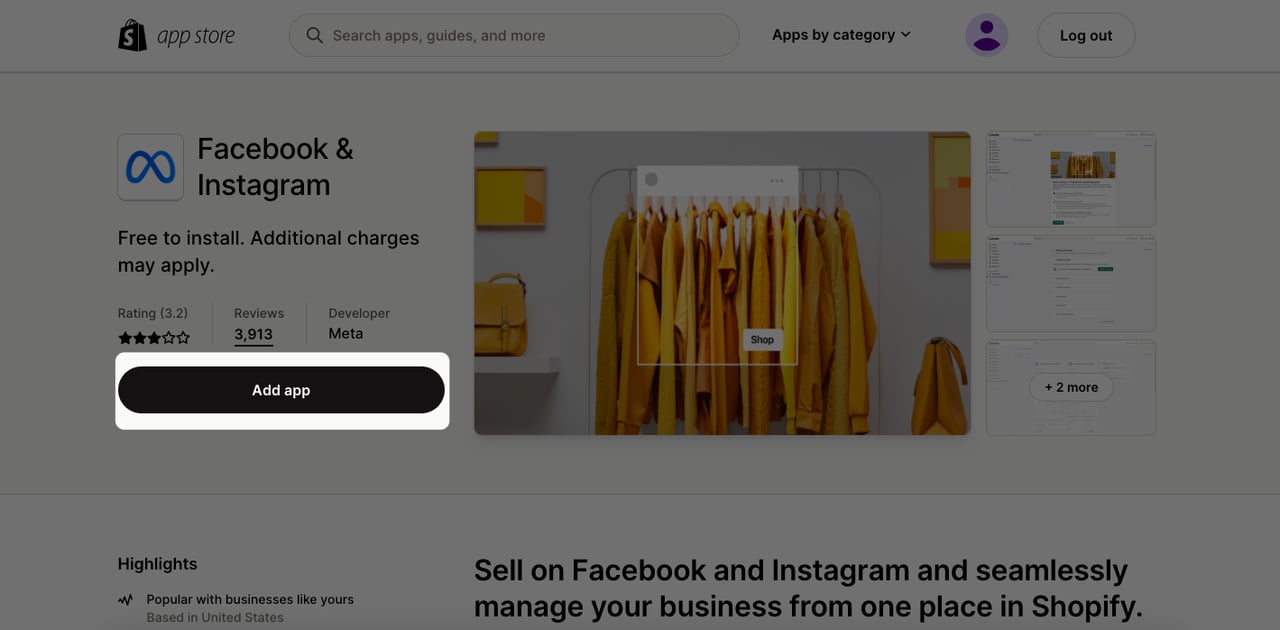
From the page of the Facebook pixel on Shopify app store, click on the “Add app” button to add it to your store.
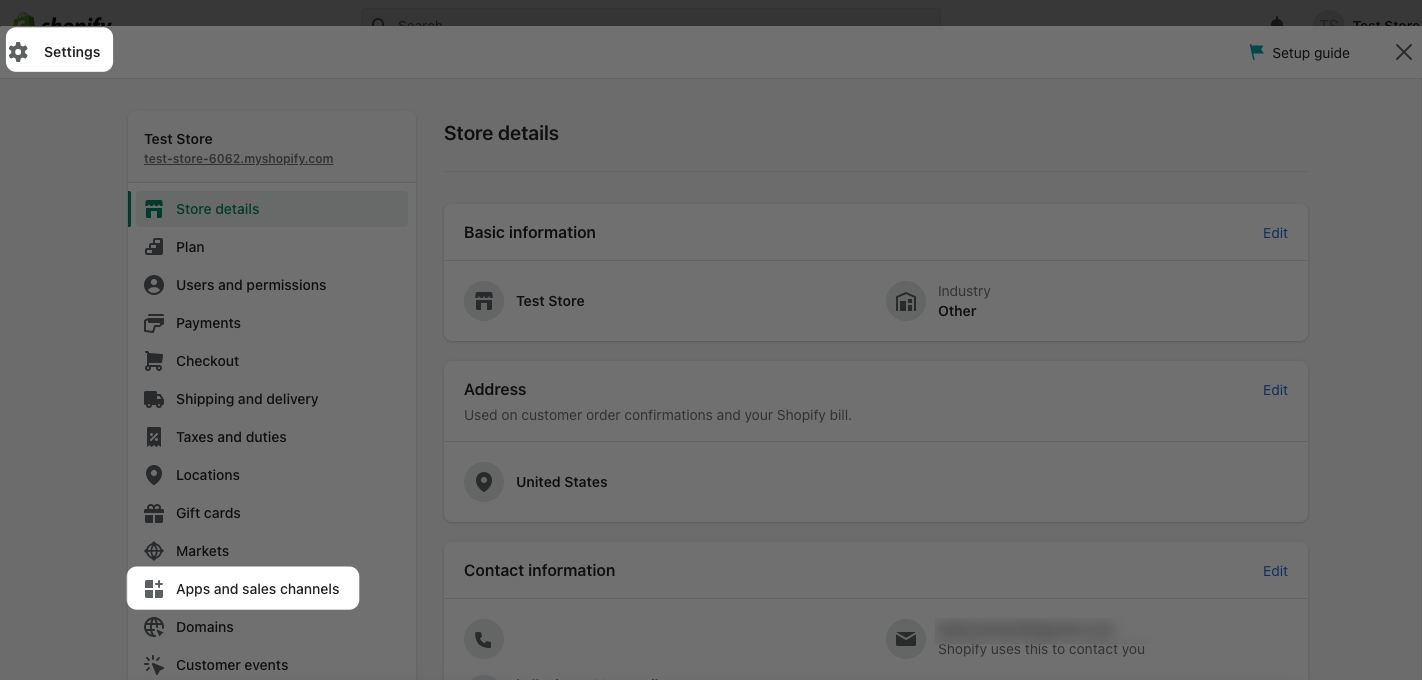
Go to the “Settings” part and select “Apps and sales channels” from the left side.
You will see your Facebook pixel there; select it to adjust its settings. Then, click “Open sales channel” first, and from the “Settings” part, select “Data sharing settings.” You need to select “Enable data-sharing” from the “Customer data-sharing” section.
You can select either “Standard, Enhanced, or Maximum” in the “Choose data-sharing level” section according to your needs.
Choose your Facebook pixel from the list and click on the “Confirm” button.
Adding Facebook Pixel Code to Shopify Theme Manually
If you choose to add it manually, you can follow the steps on Facebook Event Manager and get your code, as shown below.
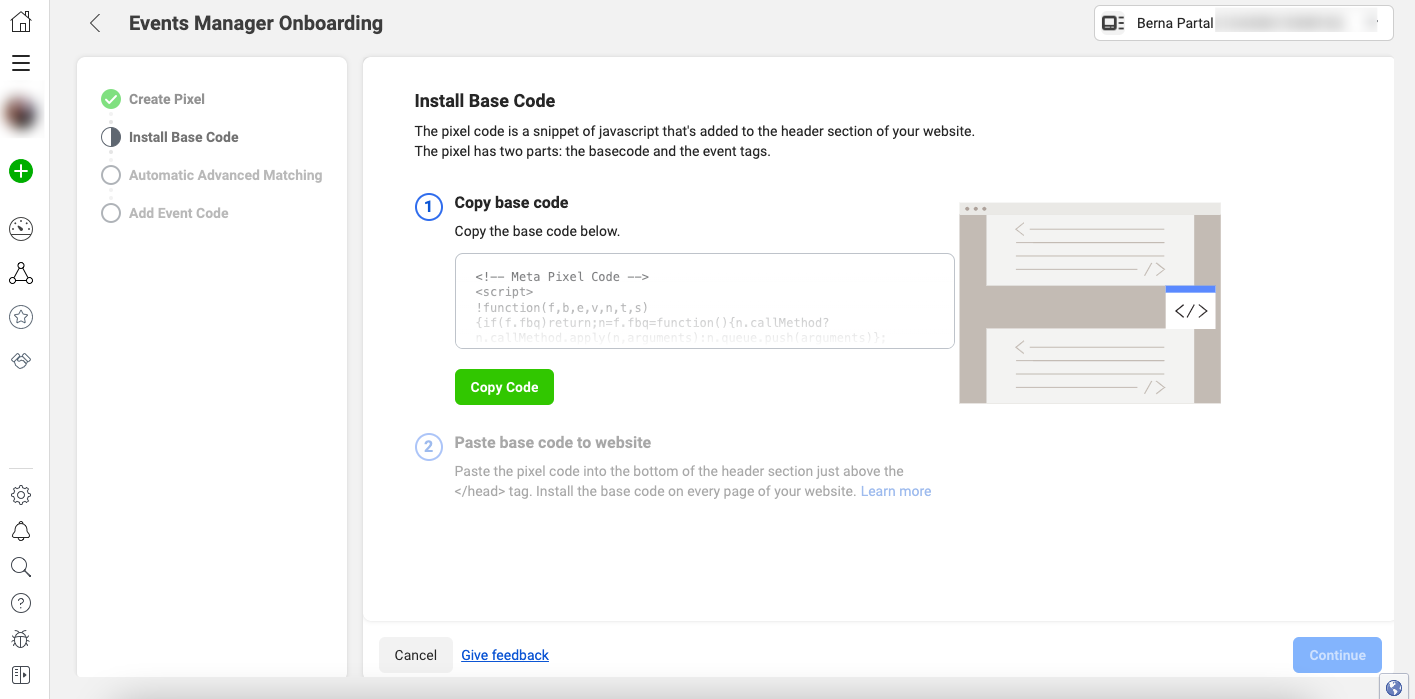
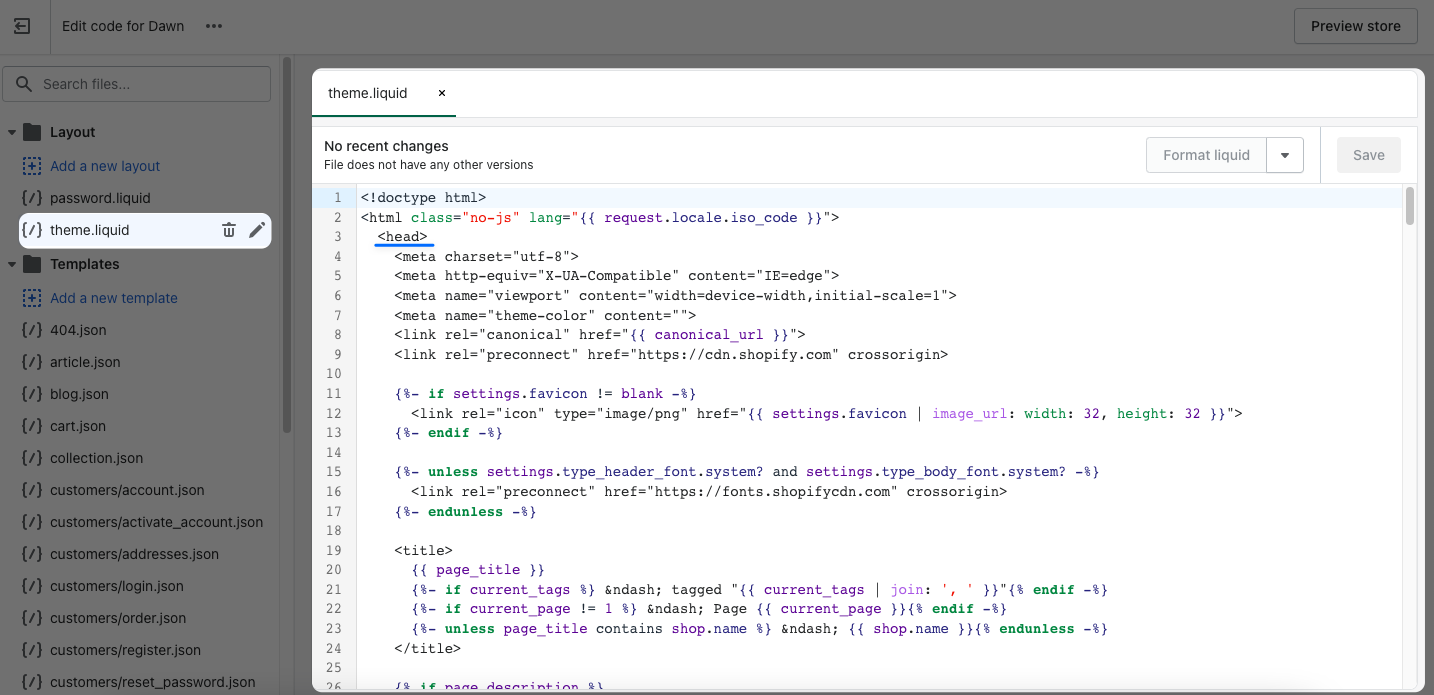
Copy your Facebook pixel code from this section.
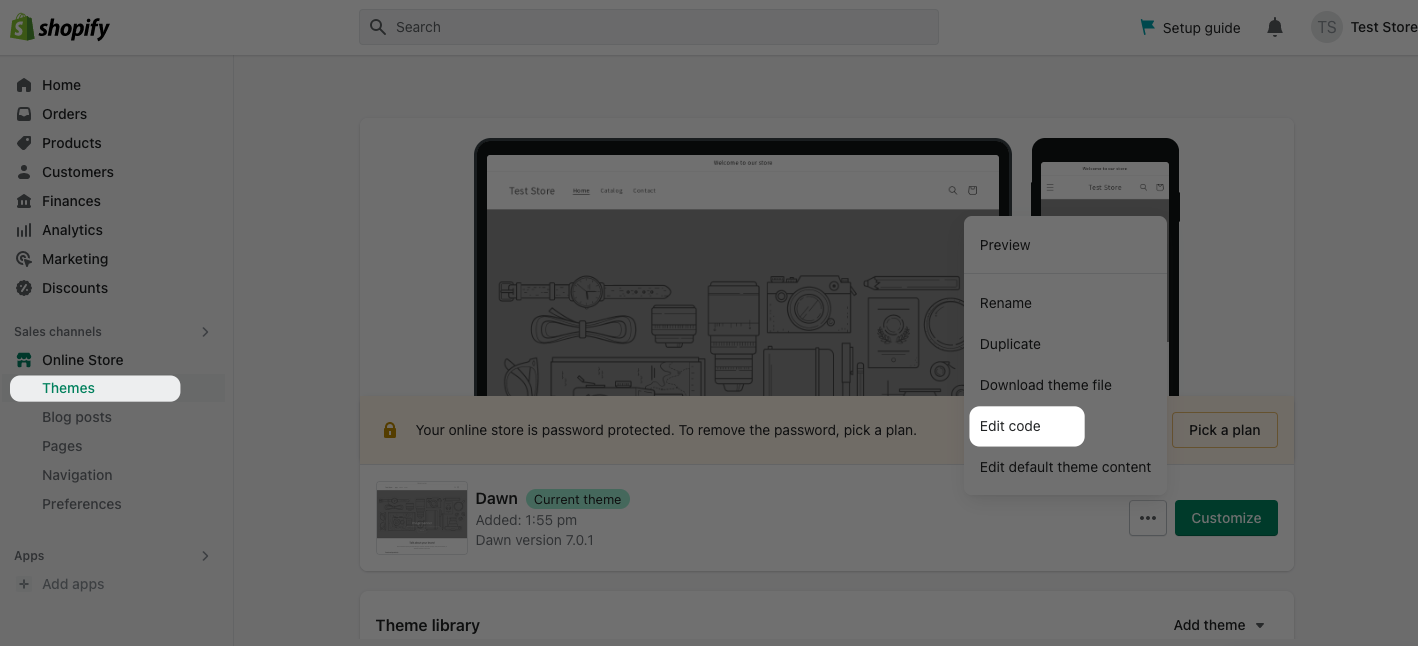
Then, go to your Shopify store’s admin panel first and go to the “Themes” section. Click on the “Edit code” of your store’s theme.
How to Delete Facebook Pixel from Shopify?
If you want to delete Facebook pixel on the Shopify store, you need to follow these steps:
Go to your Shopify admin panel, first click on “Settings,” and choose “Apps and sales channels.”

From this section, choose “Facebook” and “Open sales channel.” On the “Settings” part, go to the “Data sharing settings” and select “Disconnect” to disable your Facebook pixel.
Note: If you added your Facebook pixel via editing your theme file, you have to remove it as well. If you are planning to add a Facebook pixel ID and don’t delete the pixel code, it might result in incorrect data.
Tips & Things to Consider to Add Facebook Pixel to Shopify

➤ Use the proper pixel code for the Facebook ad account you wish to track if you have several ad accounts. It’s crucial to utilize the correct pixel code because every ad account has a different one.
➤ If you have multiple Shopify stores, add the pixel code to each store separately. To track conversions and build segmented audiences, each store will require its own pixel code.
➤ You can create custom audiences and lookalike audiences using Meta pixel on your store. That way, reaching specific audiences becomes so much easier.
➤ In your Facebook Ads Manager, take configuring custom conversions into consideration. By doing this, you’ll be able to keep tabs on particular actions that visitors do on your website, like completing a purchase or filling out a form and utilize that data to improve the performance of your ads.
➤ By running dynamic Facebook ads for your products, you can reach your goals properly. Set your goals for various segments of your business, and get the most out of your product ads.
➤ You need to have sufficient data and events on your Facebook pixel on Shopify so that you can get a better insight into your campaigns.
➤ Consider forming custom conversions on your Facebook pixel by using trigger rules according to your business. You can try using URL contains as your base rule to see custom conversions of specific URLs.
Wrap Up
In conclusion, adding a Facebook pixel to your Shopify store is a quick and easy way to track the success of your marketing initiatives. Also, it allows you to learn important details about your customers’ activities.
You can quickly set up and start using your Facebook pixel to improve ad targeting, retarget website visitors, and evaluate the success of your marketing efforts.
Following the instructions we have provided in this post, you can quickly create a Meta, formerly the Facebook pixel, and add it to your Shopify store. Regardless of your level of experience in the field of e-commerce, you can start using this feature and achieve your business goals.
We hope you found this article helpful, and if you have any comments or questions, feel free to leave a comment and share them with us! 🤓
Frequently Asked Questions

Why You Should Add Facebook Pixel to Shopify?
You can create better ads and campaigns by tracking your visitors’ actions. As a result, your ads will be shown to the right people at the right time, making it easier to achieve your business goals.
Also, since it allows you to create custom audiences, you can reach them better and boost your Shopify store’s conversions.
What Are The Use Cases of Facebook Pixel for Shopify Stores?
You can use Facebook pixel for your Shopify store to track your visitors’ behaviors and set custom audiences. In addition, it allows you to track certain behaviors, which will help you to come up with various strategies.
Using Facebook pixel on your Shopify store, you can track standard events like:
- Payment information
- Users who add products to their wishlist
- Actions like adding products to the cart
- Search behaviors
- Purchasing products
Discover these blog posts about Shopify as well:
- How to Edit Shopify Password Page in 2024? (Complete Guide)
- How To Do A Test Order On Shopify With Effective Techniques
- How to Add Shopify Filters & Top 6 Apps to Use in 2024
- 10 Excellent Shopify Success Stories That Will Motivate You
- 11 Shopify Shipping Bar Apps That Will Boost Your Sales


